What You Need Before You Start
- A SEM image available in the Image Library.
- A known reference length for manual calibration.
- Login is required to export the image.
Step 1: Open NotyScale and Load Your SEM Image
Before calibration and adding a scale bar, keep this in mind:
- If the scale reference is separate from the image: Do not resize the image before calibration. Resizing changes the pixel-to-length relationship.
- If the original scale bar is already visible on the image: Resizing is fine, as long as the image and scale bar are resized together without changing the aspect ratio.
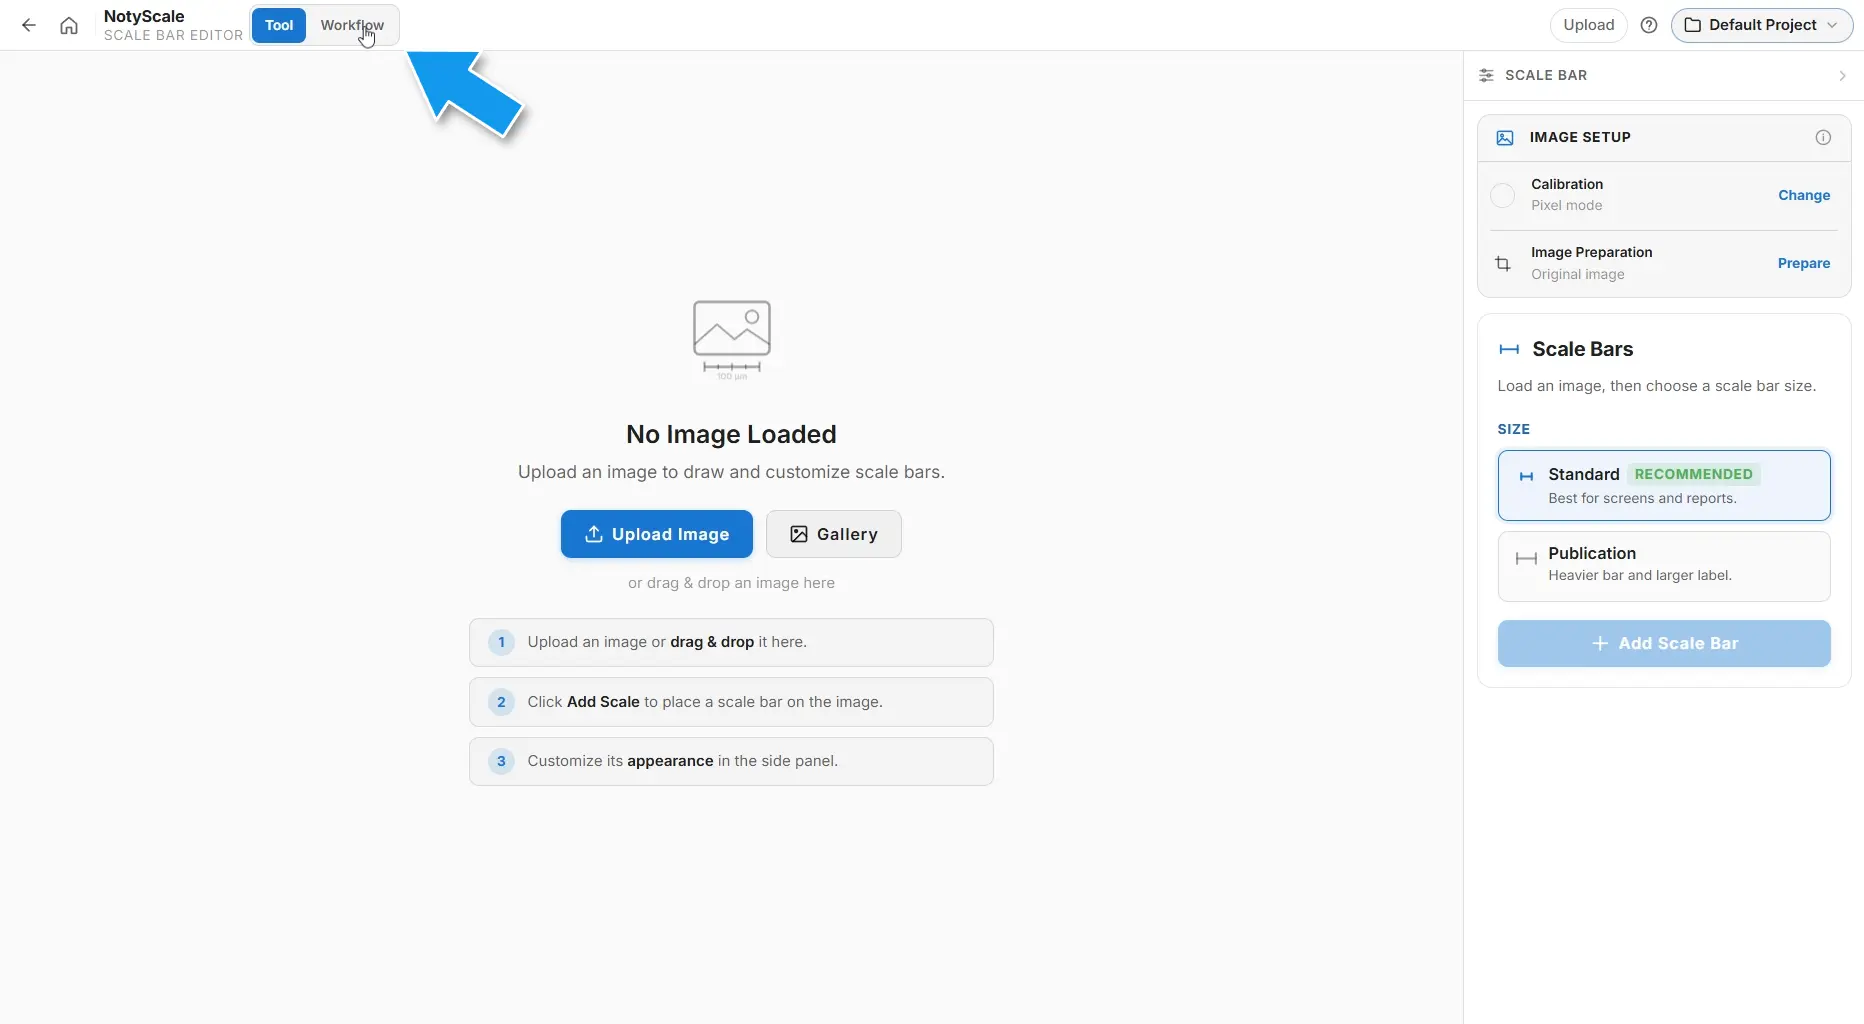
If your image has not been calibrated in NotyLab before, switch to Workflow at the top.
Workflow guides you through calibration and scale bar creation step by step, without switching between different tools.
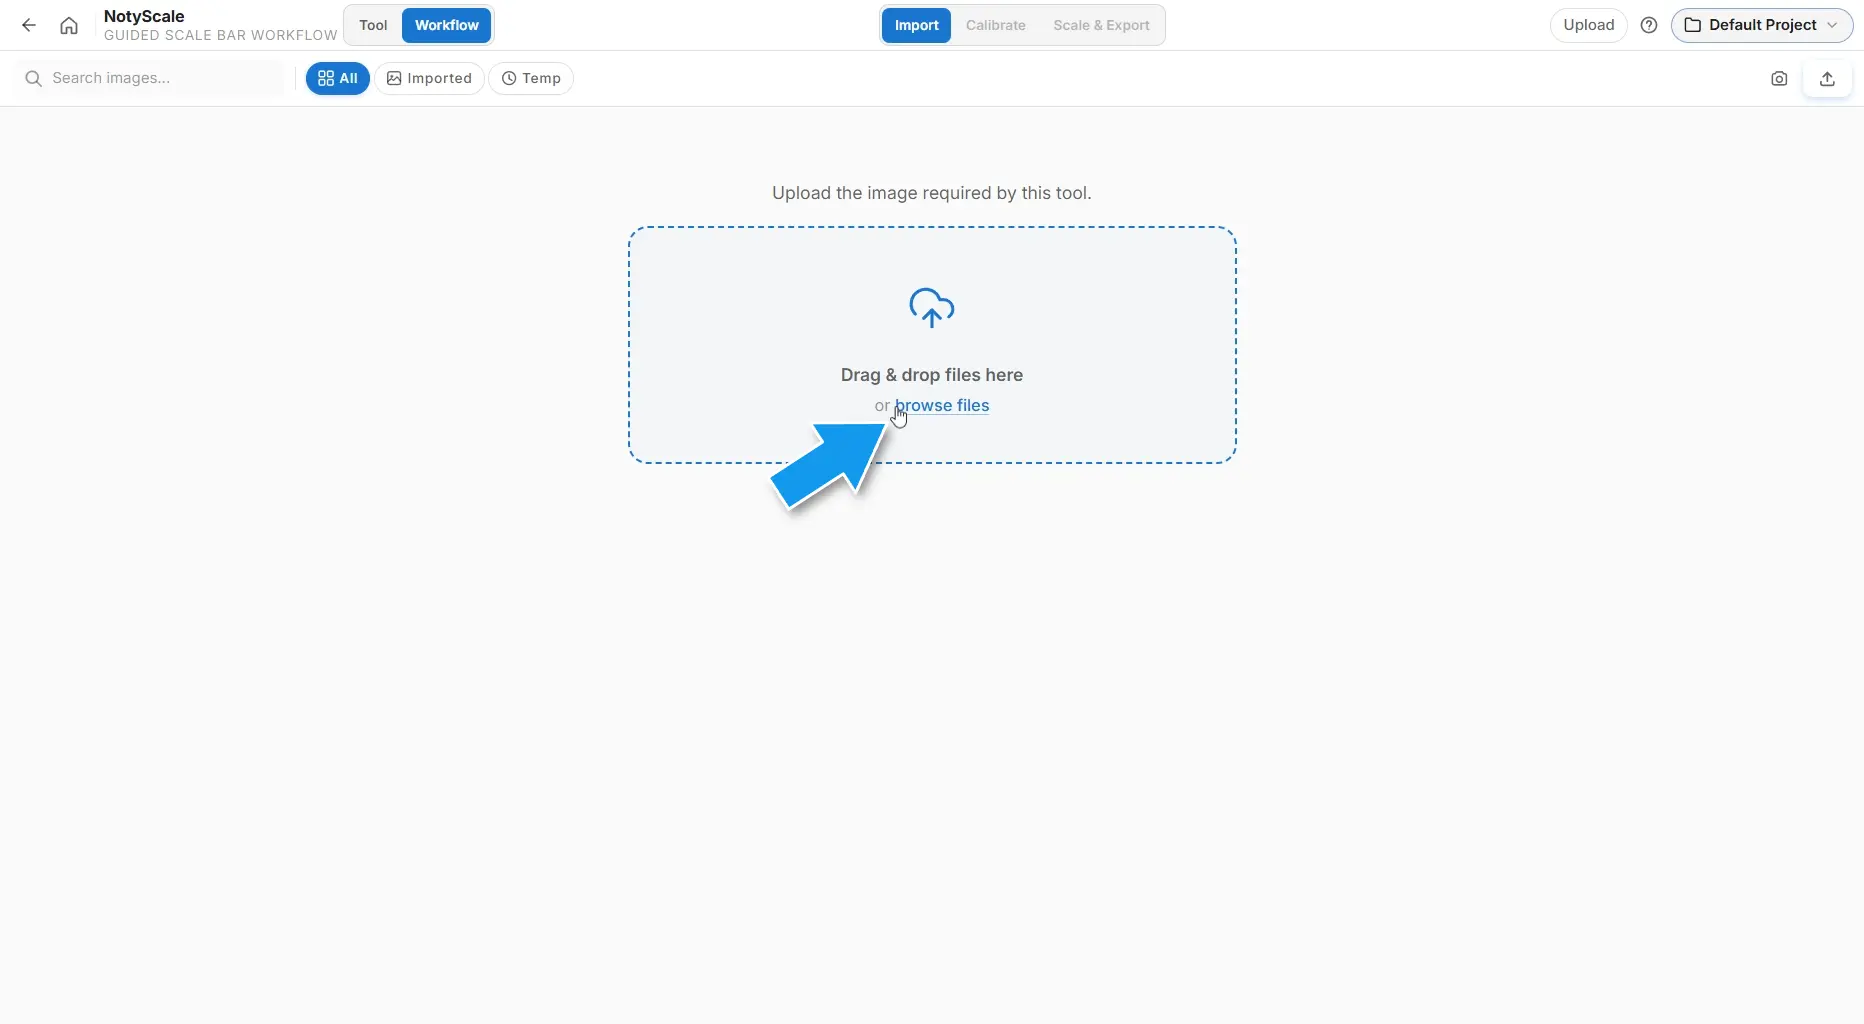
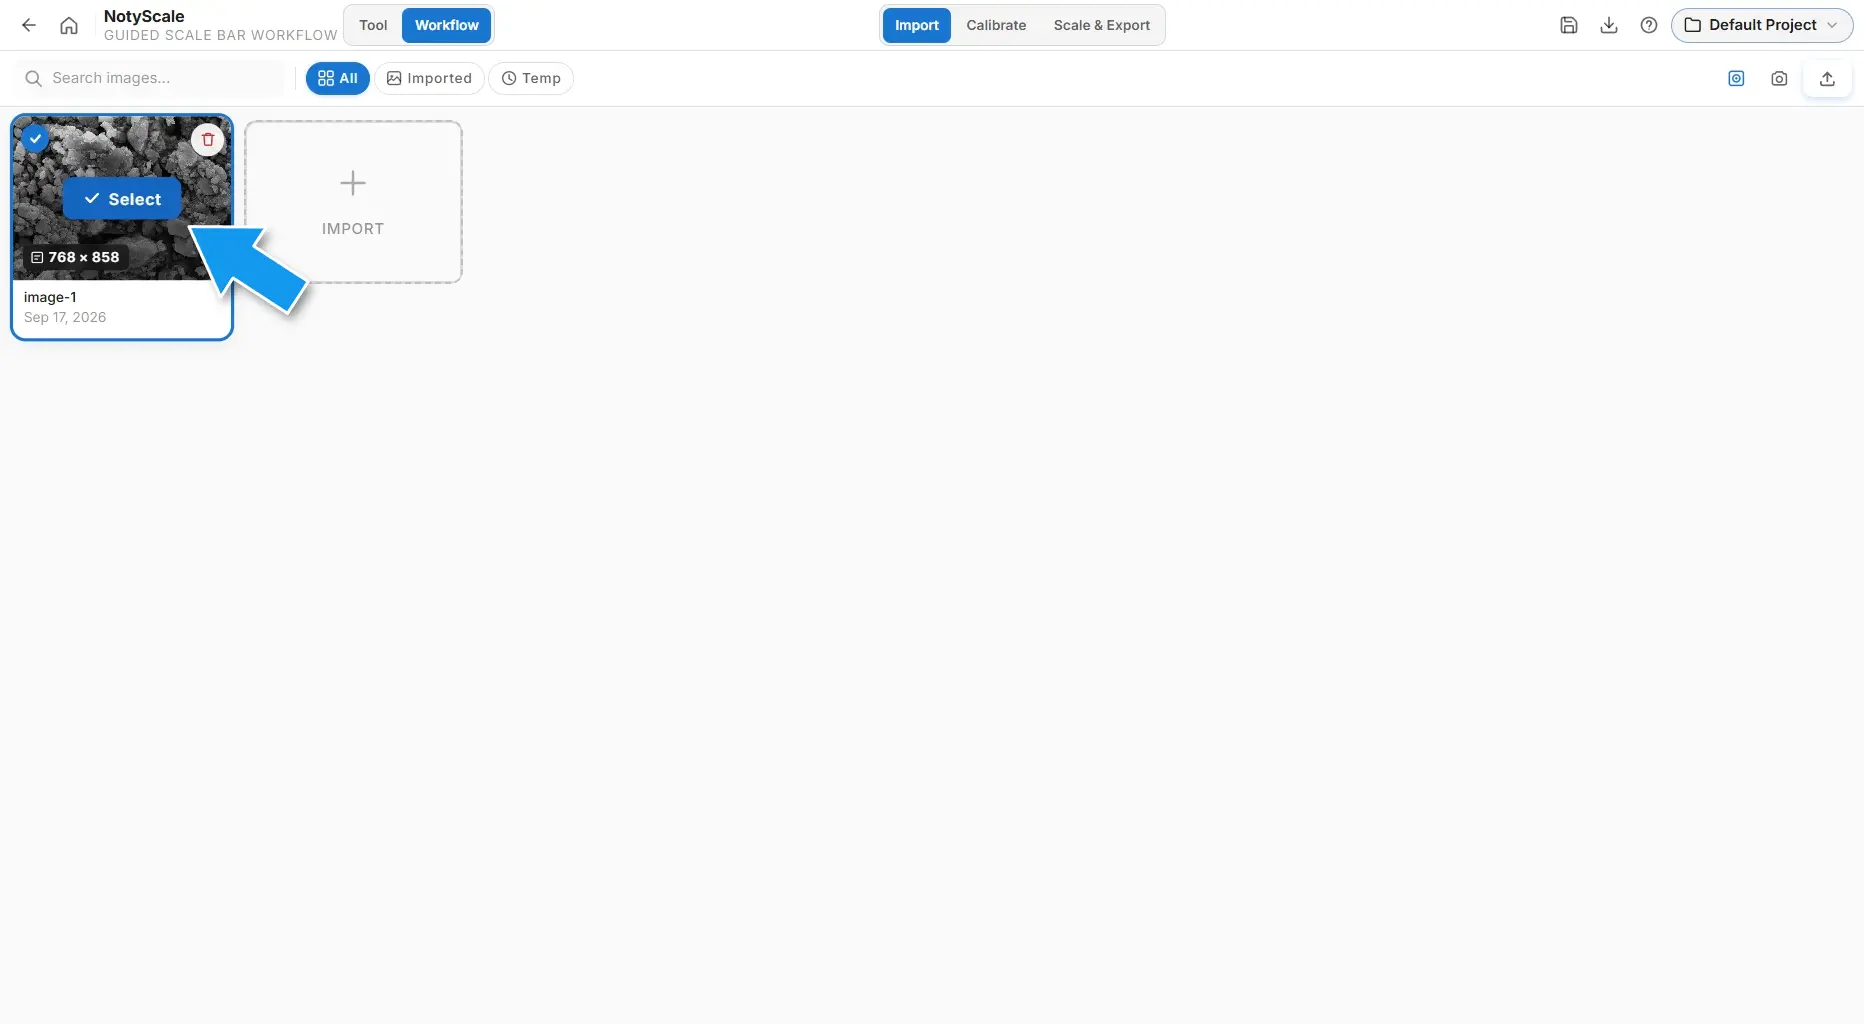
Open the Image Library, choose an image from the embedded picker, and select it to load it into NotyScale.
Step 2: Calibrate the SEM Image
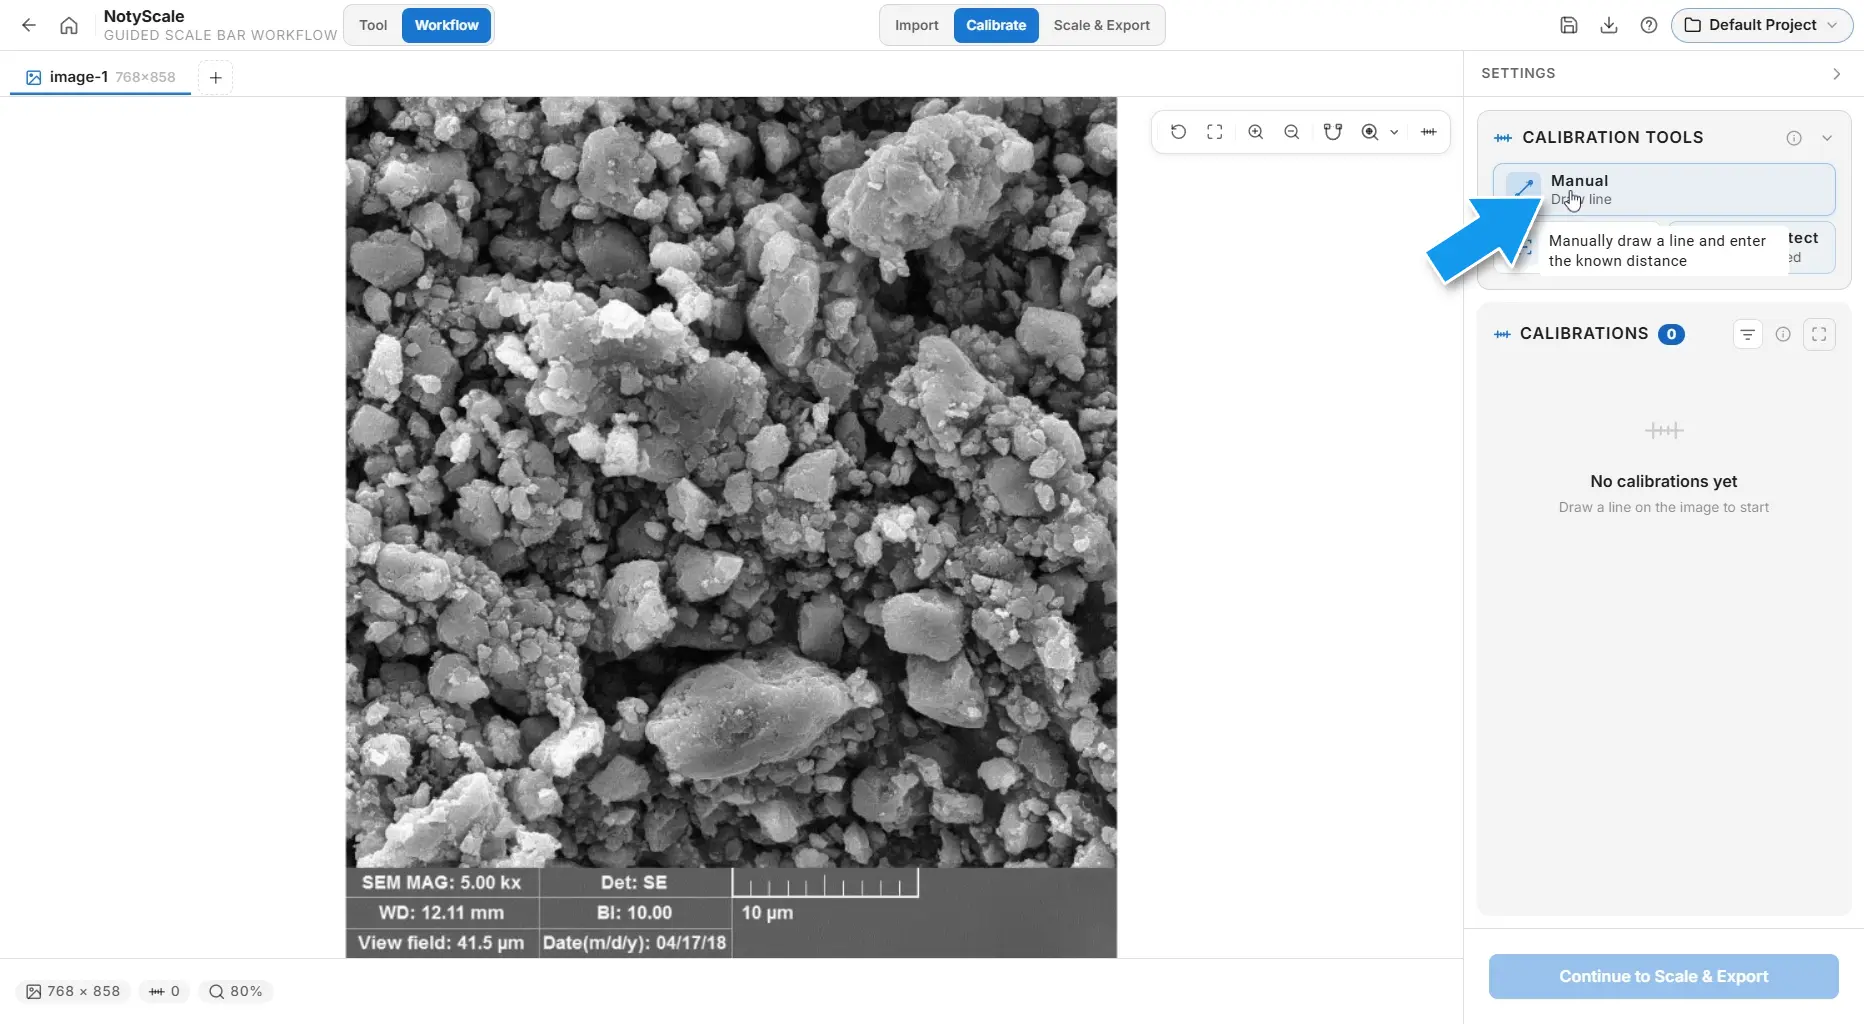
Select Manual Calibration to begin drawing a two-point reference line on the image canvas.
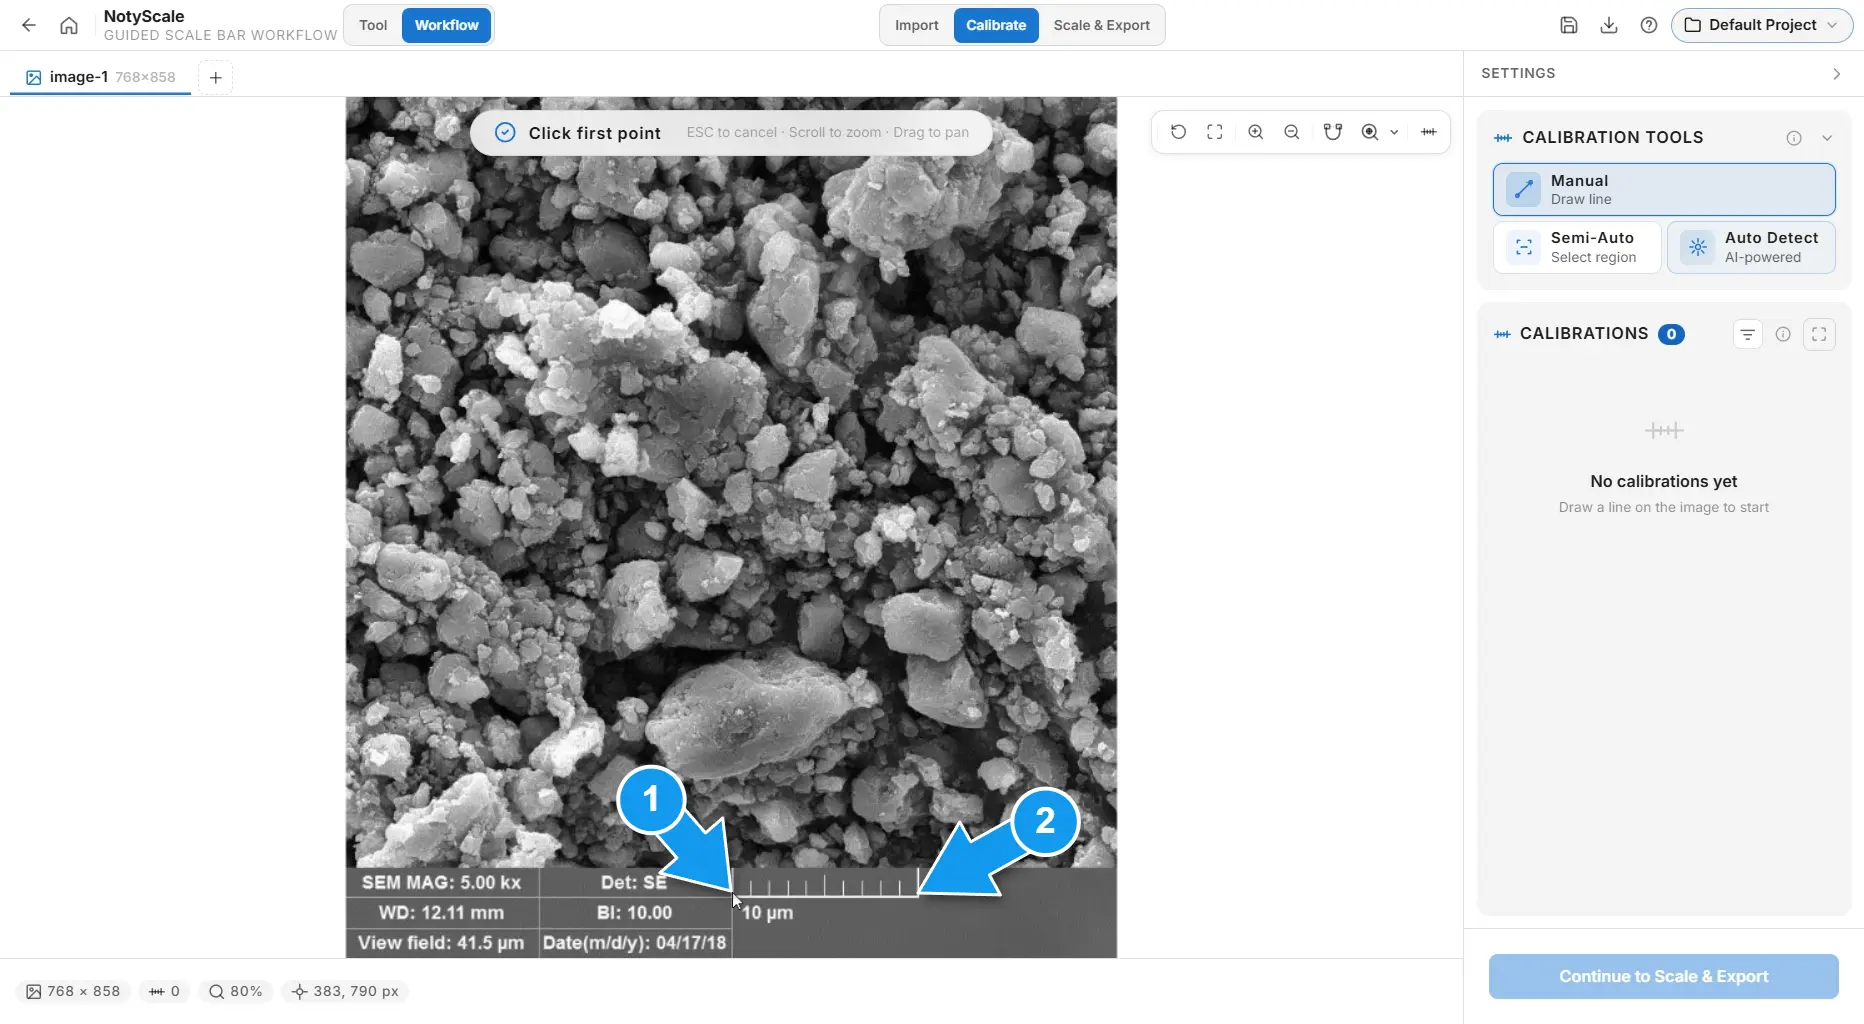
Draw a Reference Line
On the canvas, set the two endpoints of the reference line. Use the canvas controls as needed to view the reference clearly, then select Continue.
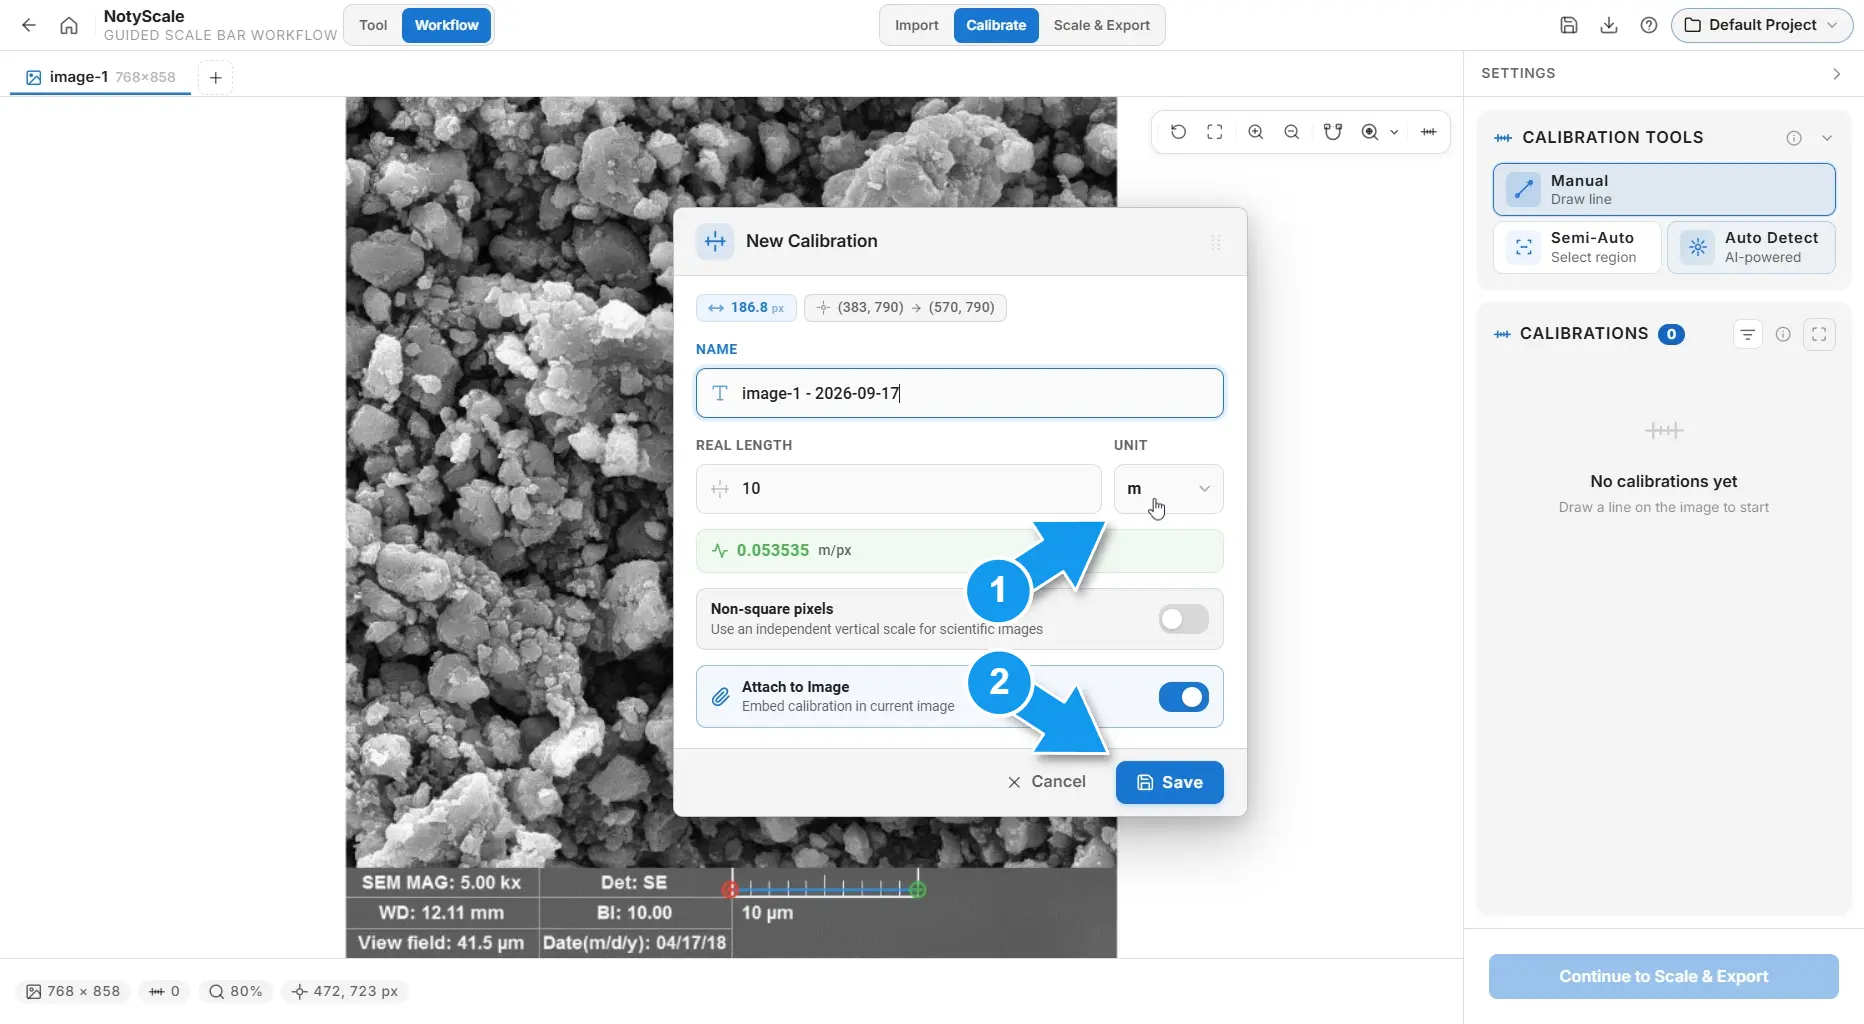
Enter the Known Length and Unit
Enter the known reference length and select the unit that matches your SEM image, such as nm or µm. In this example, the reference is entered in µm.
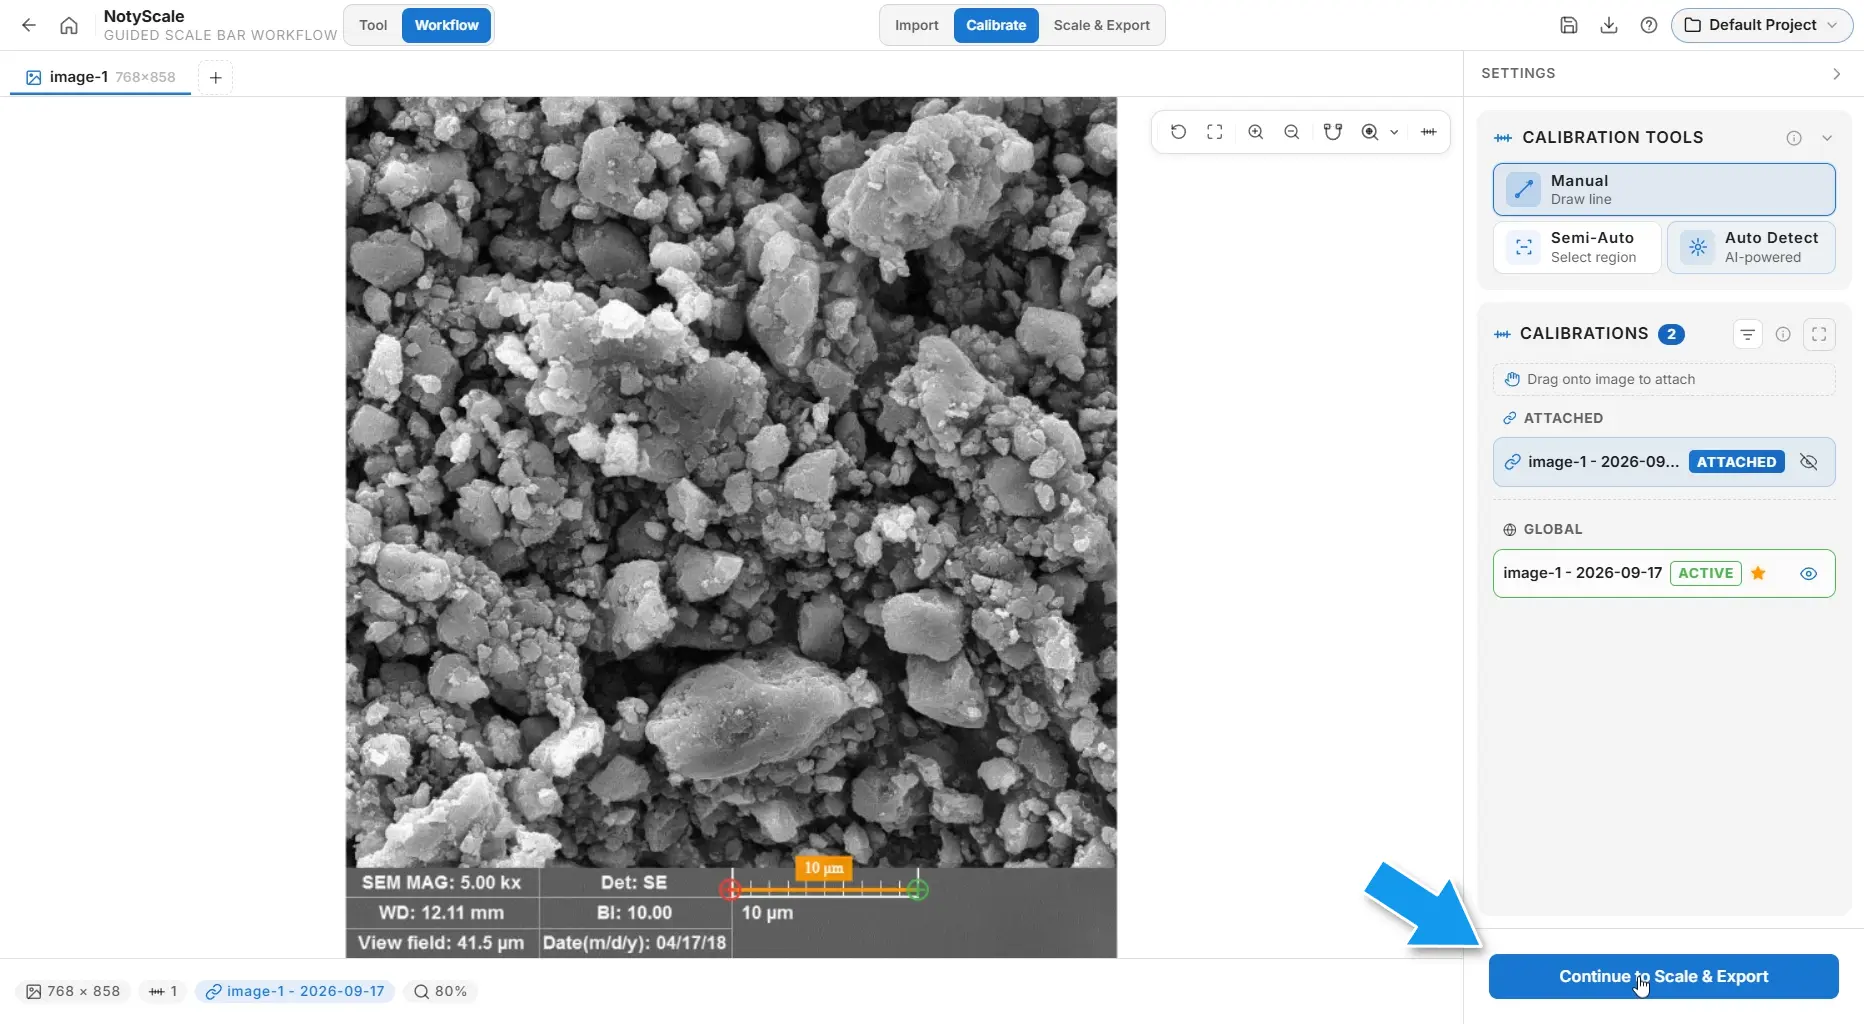
Select the workflow control to continue to the next available step.
Step 3: Prepare or Crop the Image (Optional)
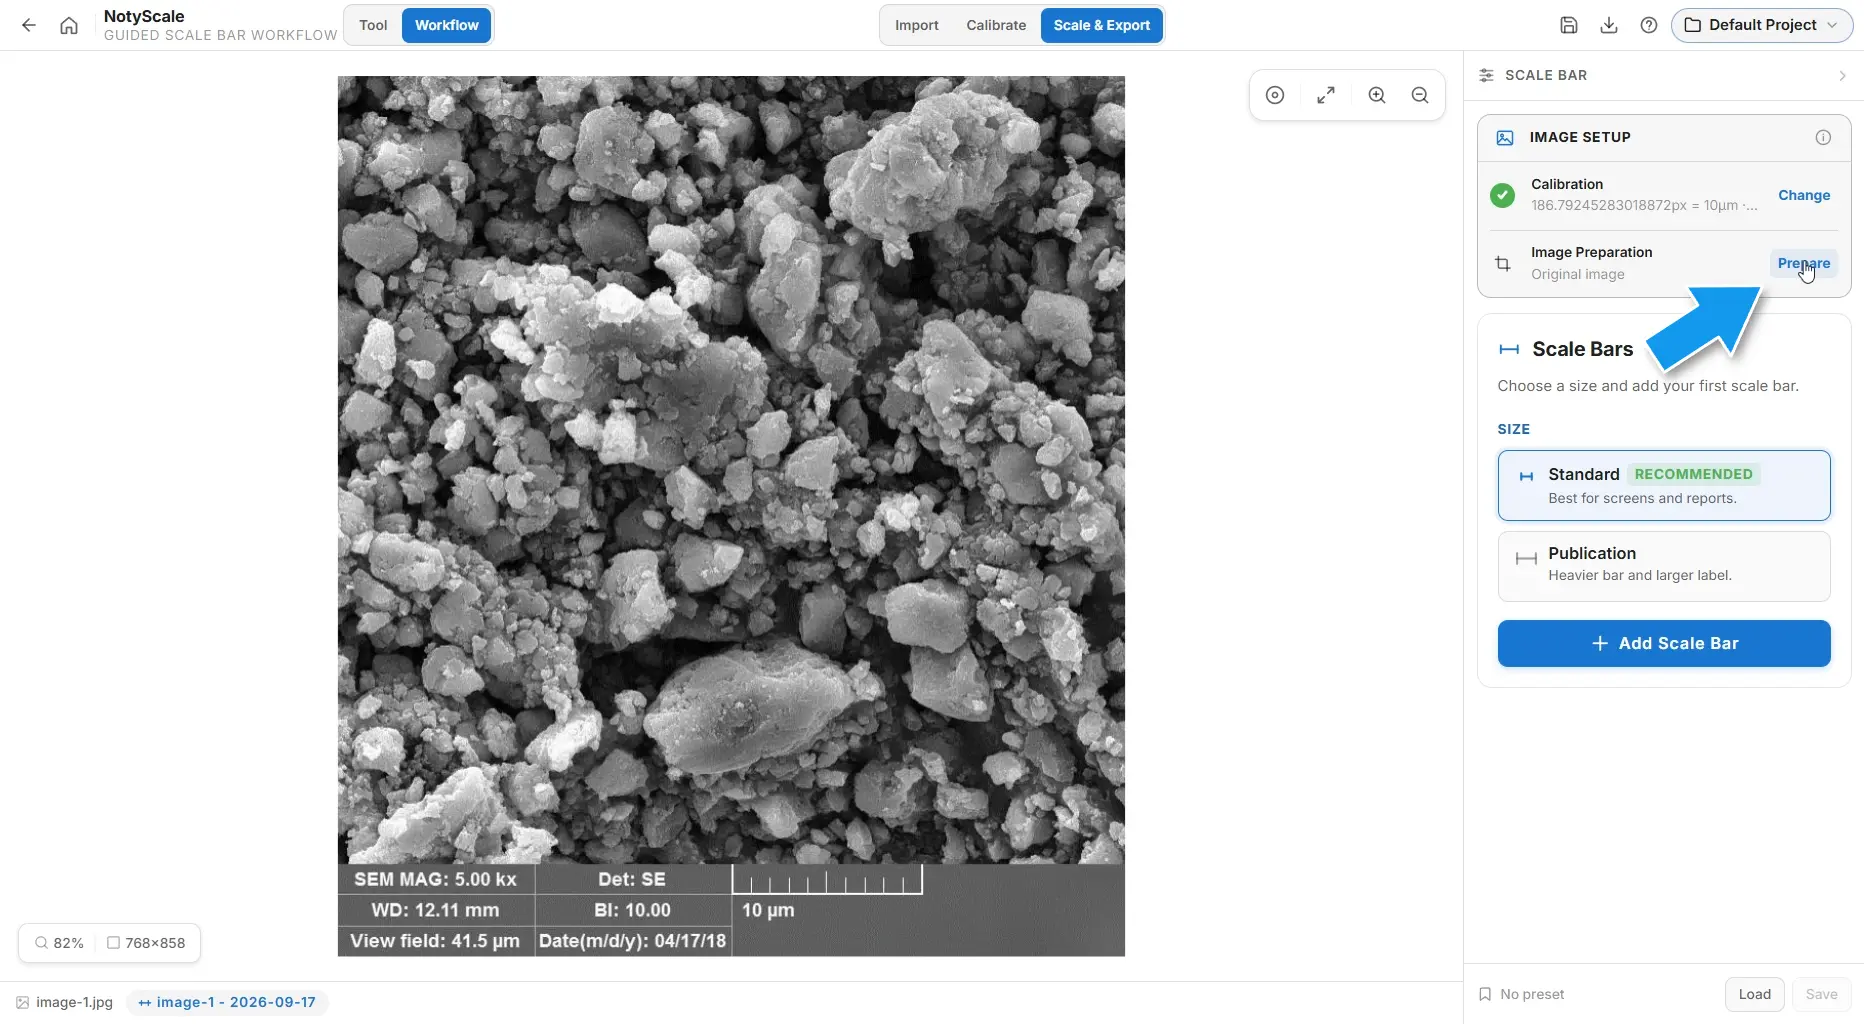
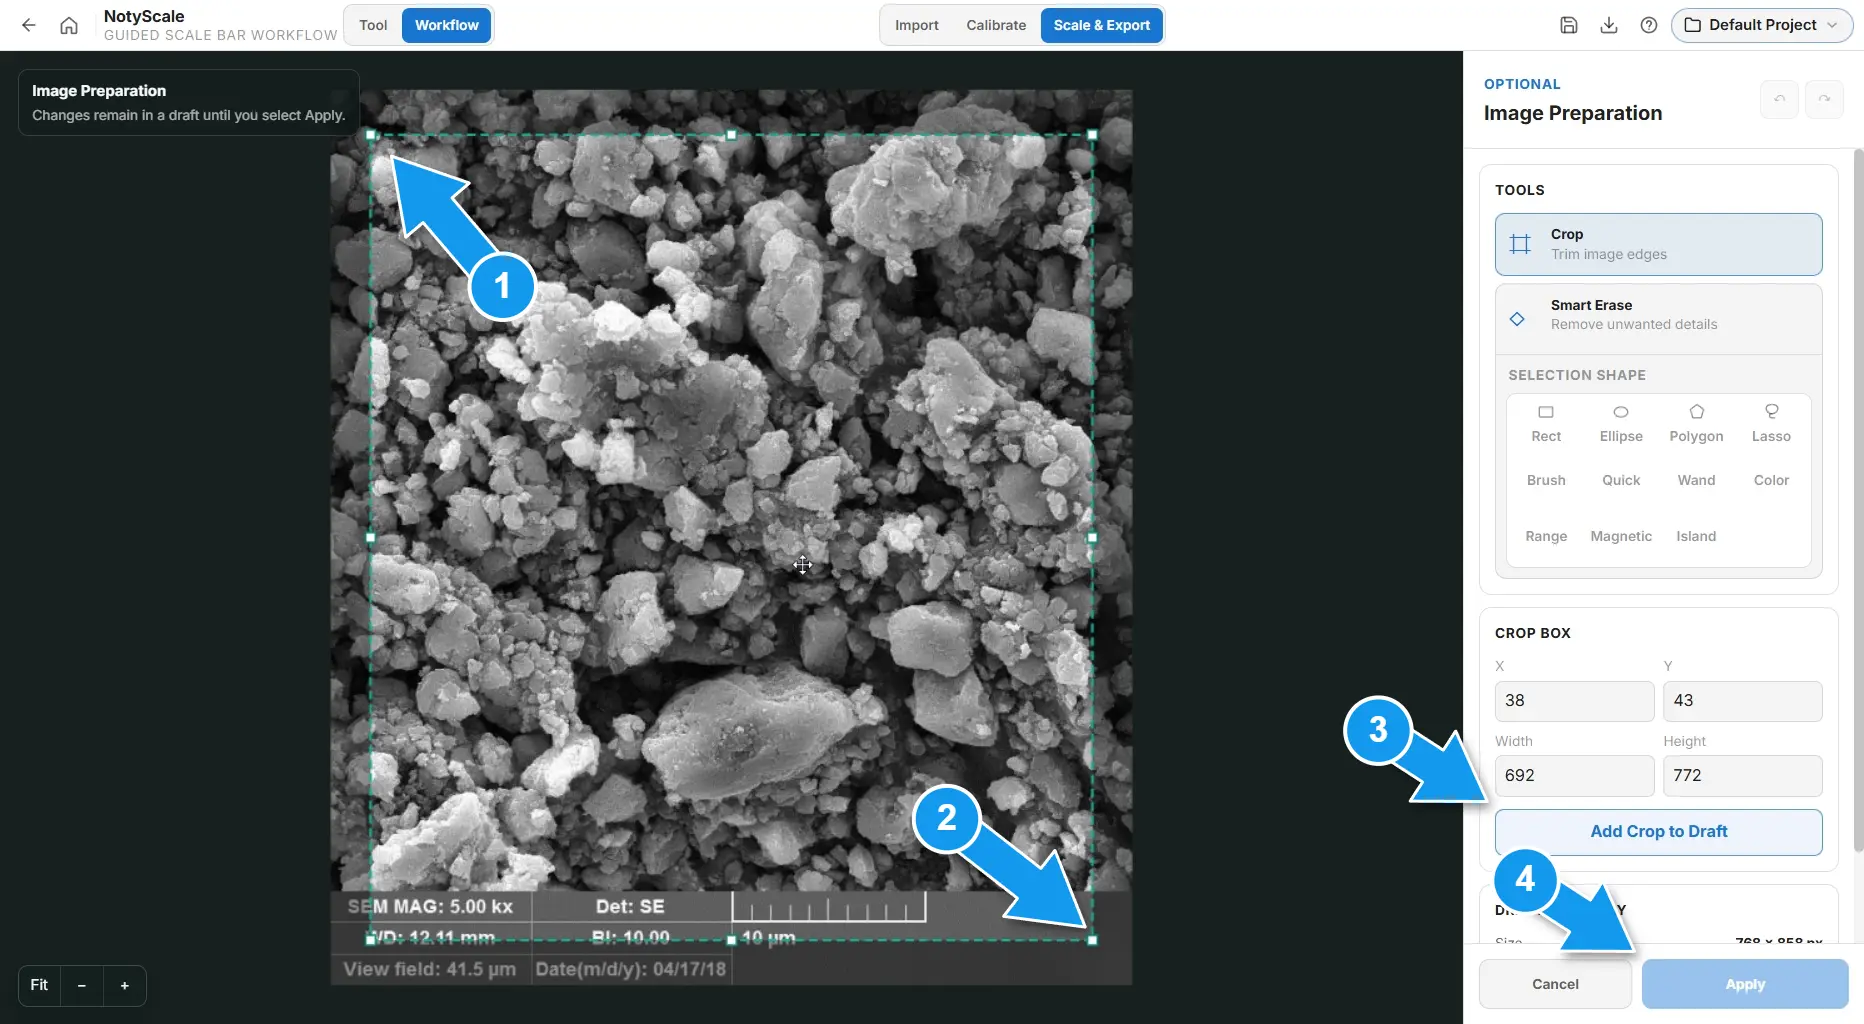
Open Image Preparation from the Image setup card. On the preparation canvas, define a crop, add it to the draft, and apply the draft to create the effective image.
Step 4: Add and Customize the Scale Bar
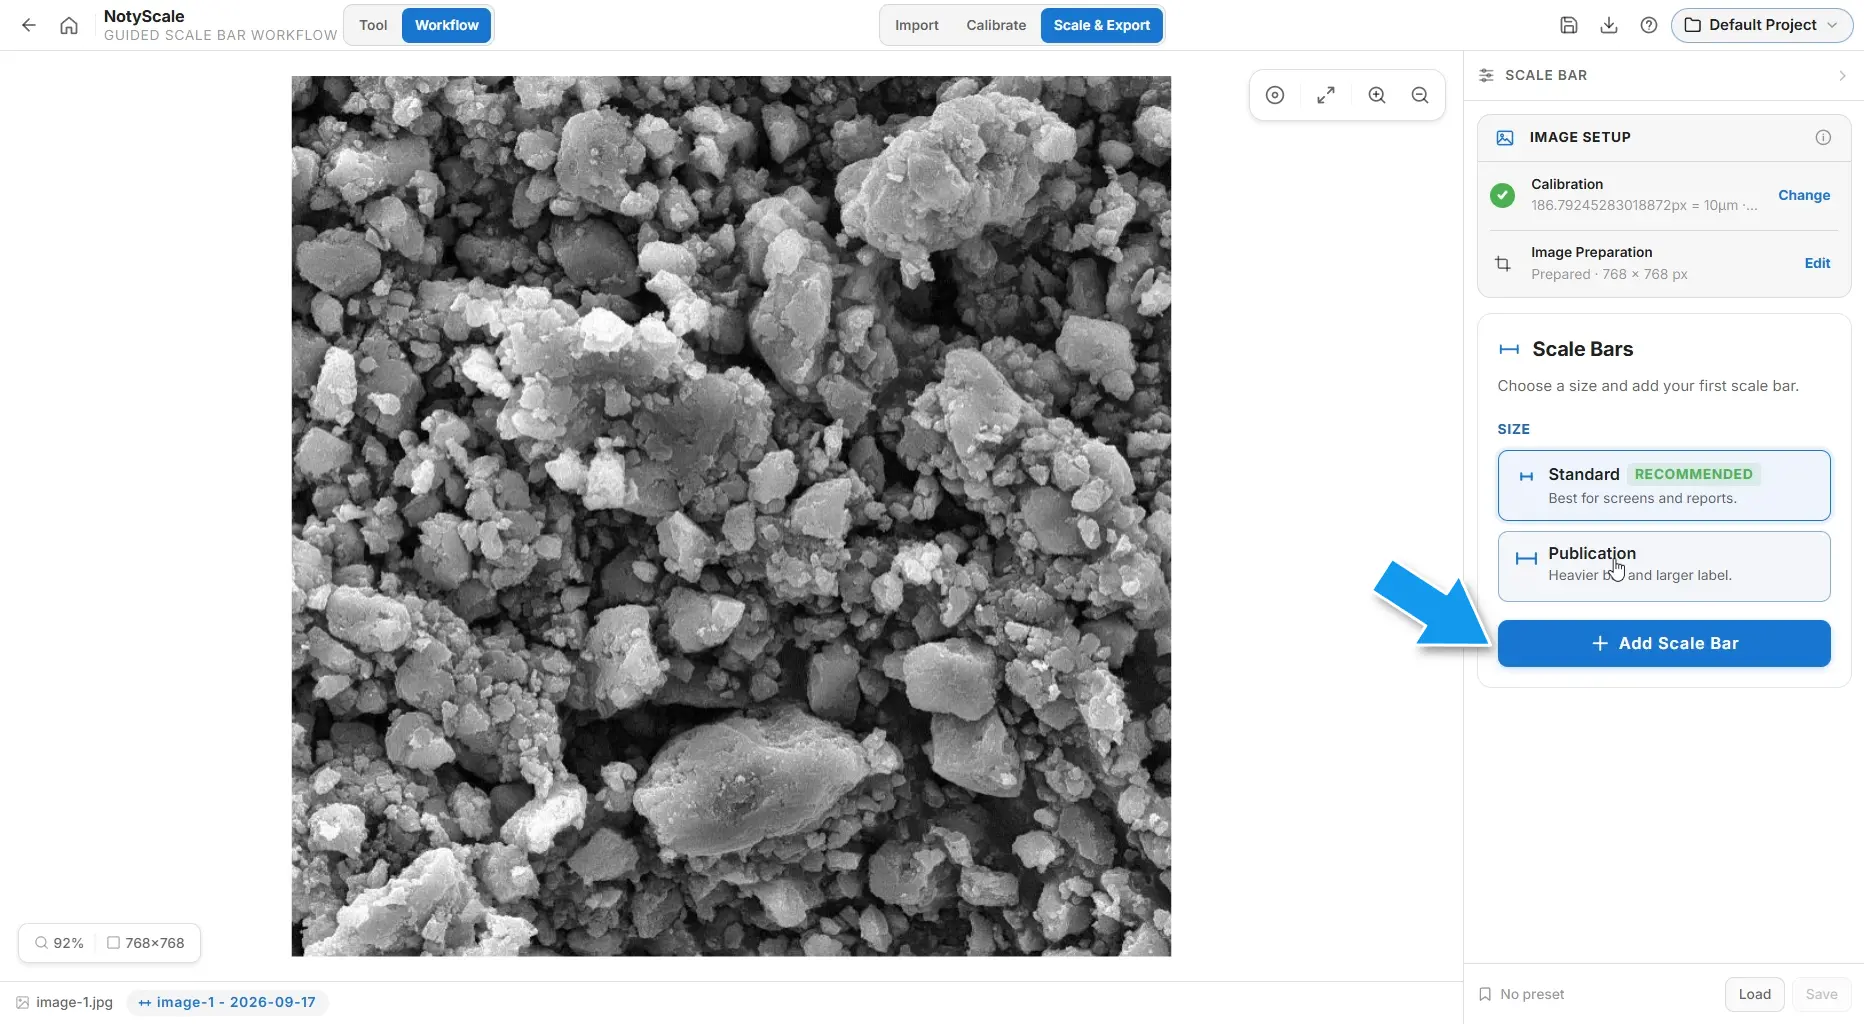
Choose the Publication Preset
In Auto Create, select Publication, then select Add Scale Bar.
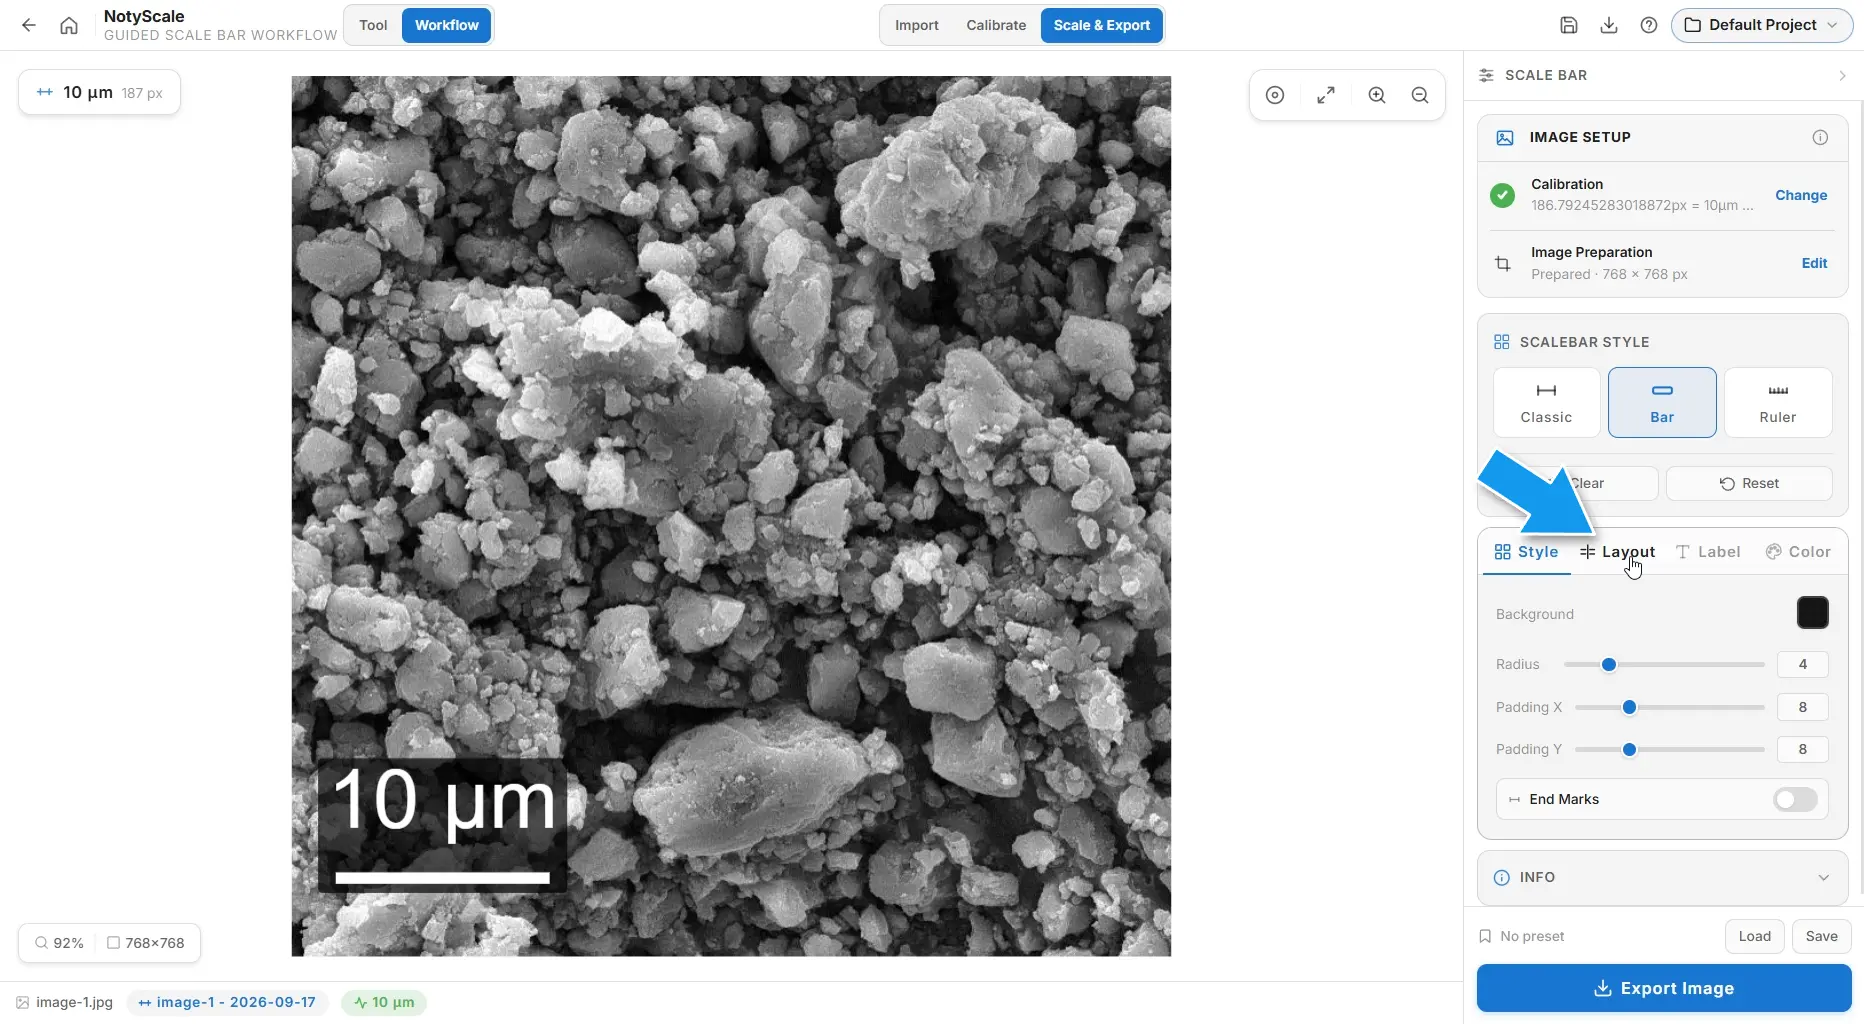
Set the scale-bar length
Open the Layout tab and change the Length value in the current display unit.
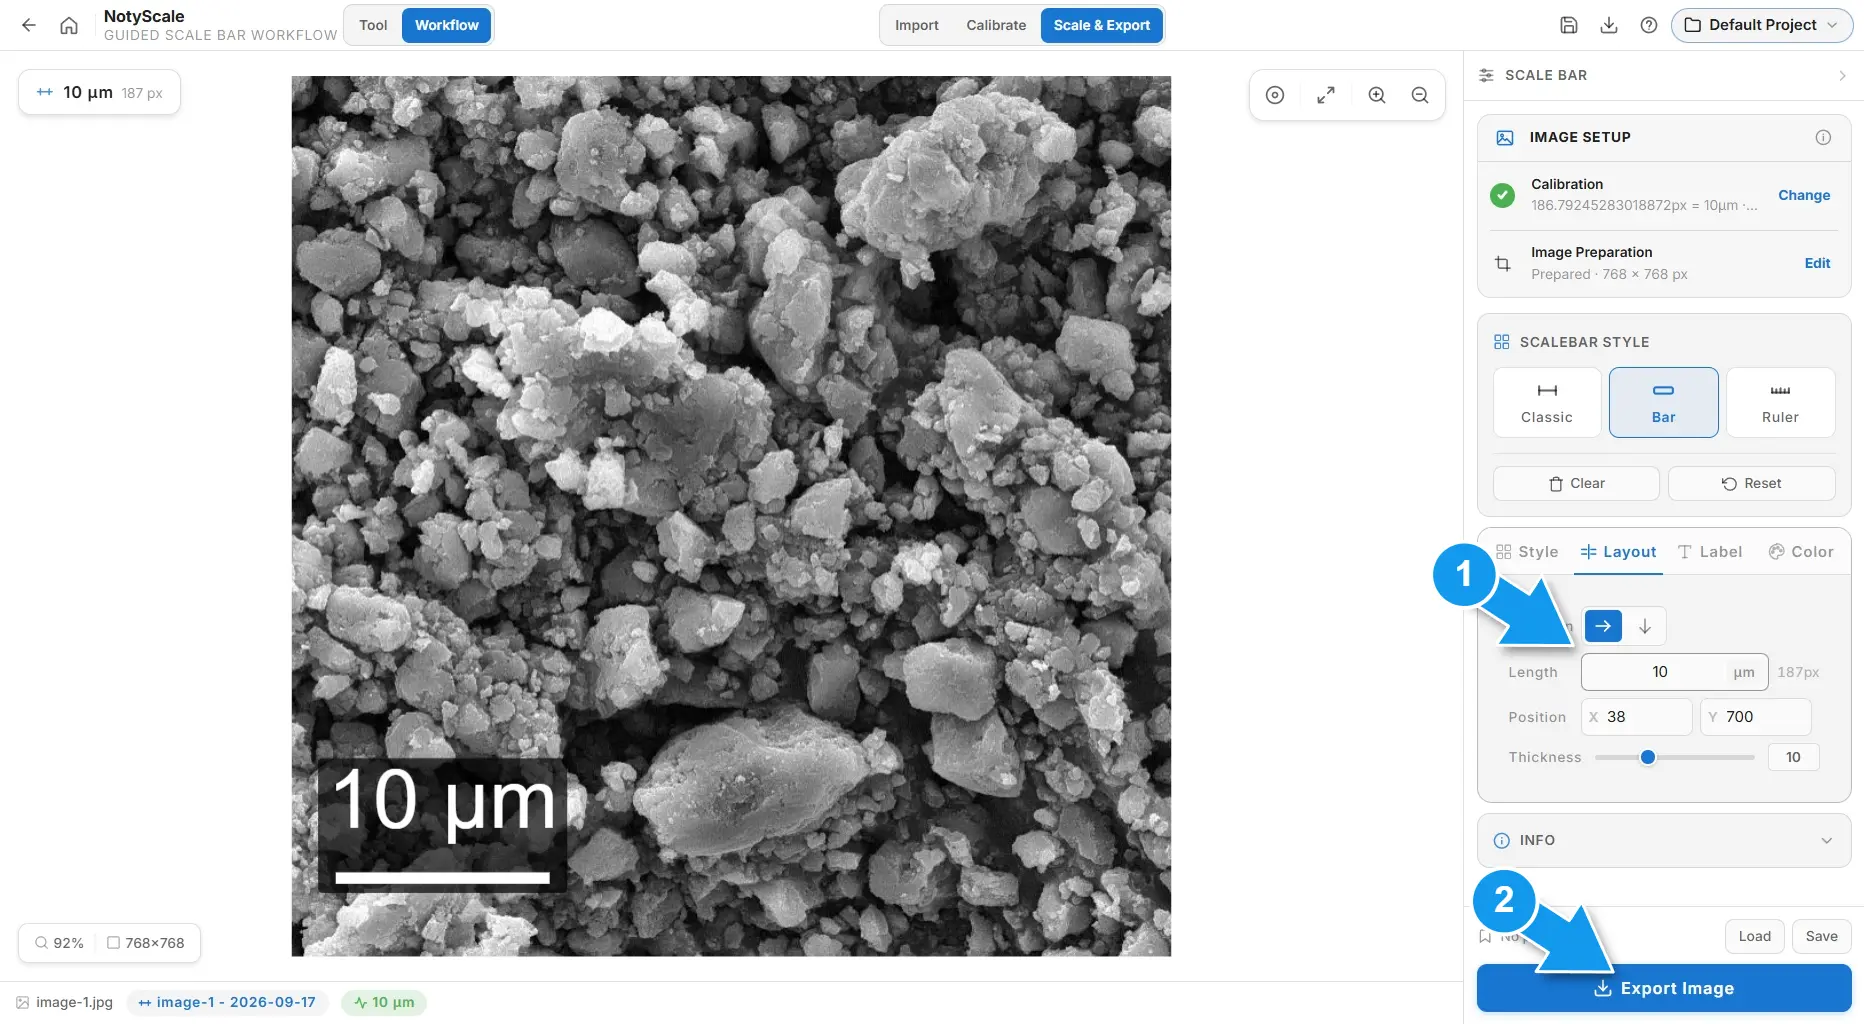
Step 5: Export the SEM Image
Select Export Image to open the export dialog for format and resolution selection.
Return to the NotyScale workspace page after configuring the scale bar and export options.
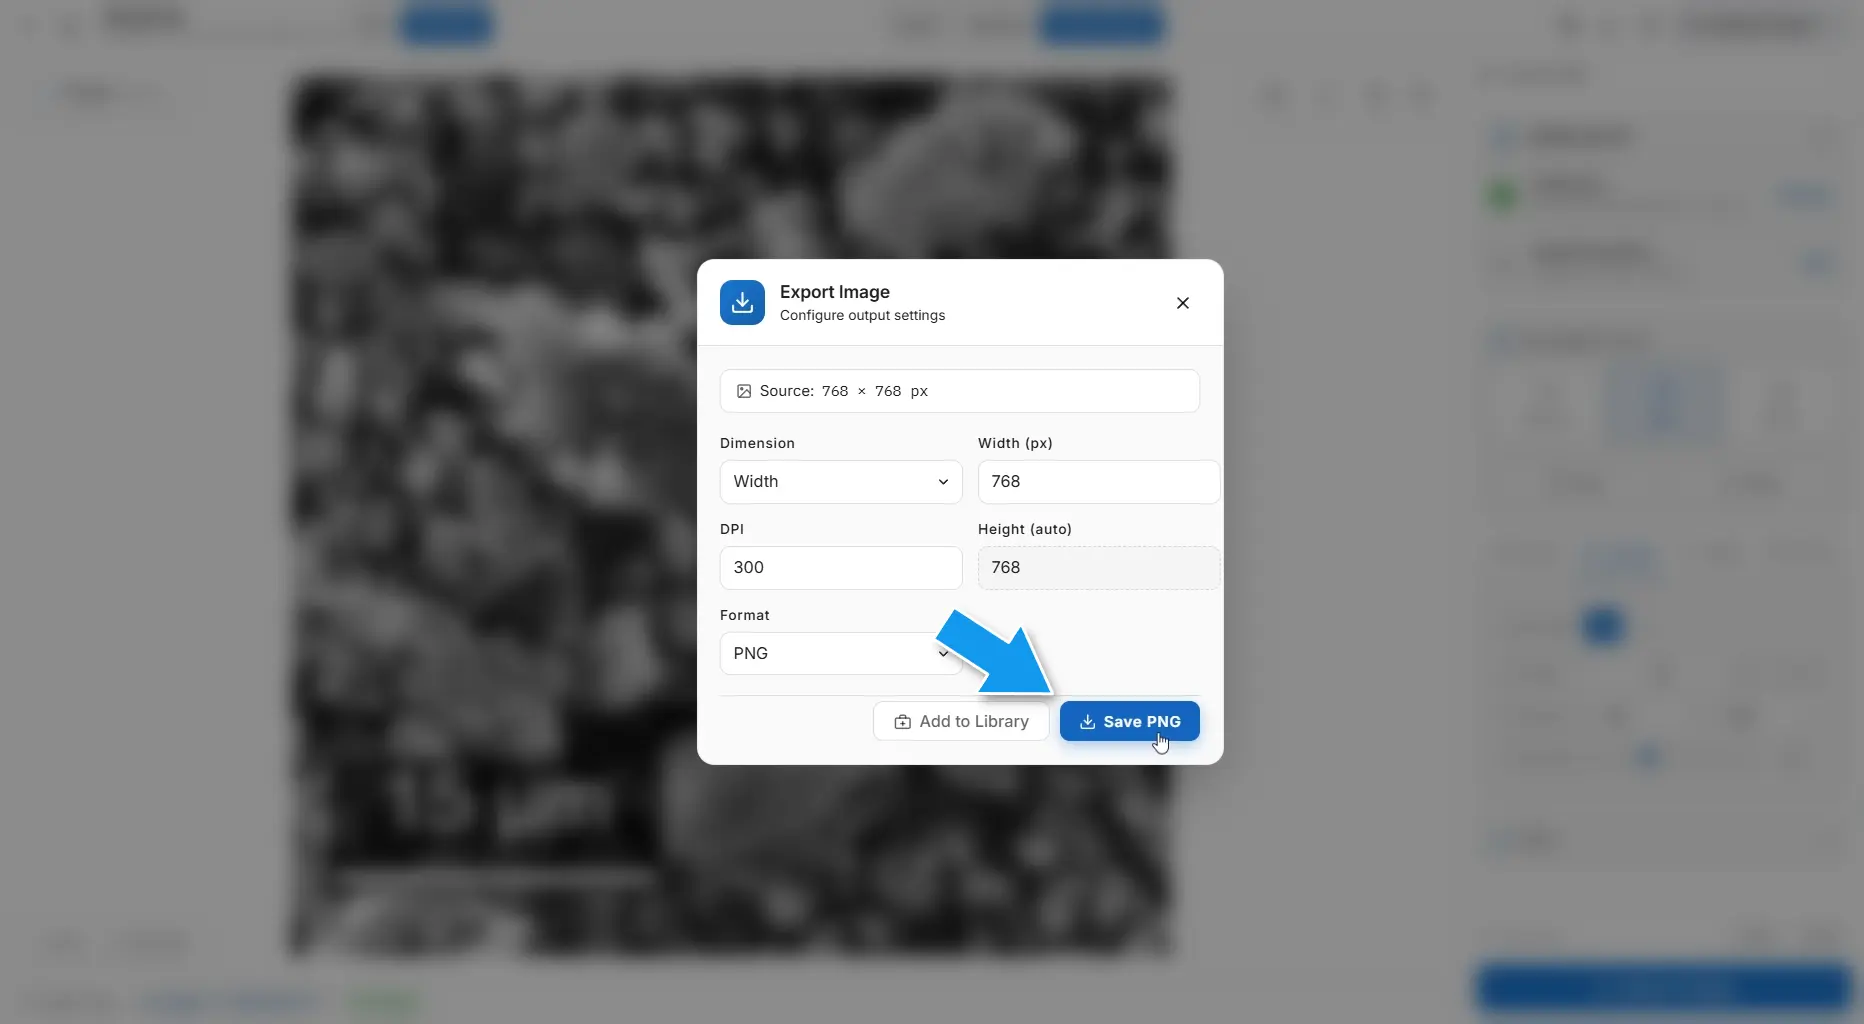
Your SEM image is calibrated and now contains an accurately sized scale bar ready for export.
Common SEM Scale Bar Mistakes
- Adding scale bar before resizing
- Using incorrect calibration
- Exporting low-resolution figures
- Using unreadable labels
- Stretching the image
Notes
- Use a reference line with a known real-world length when manually calibrating.
- Applying Image Preparation commits draft crop or erase actions as the new effective image.