
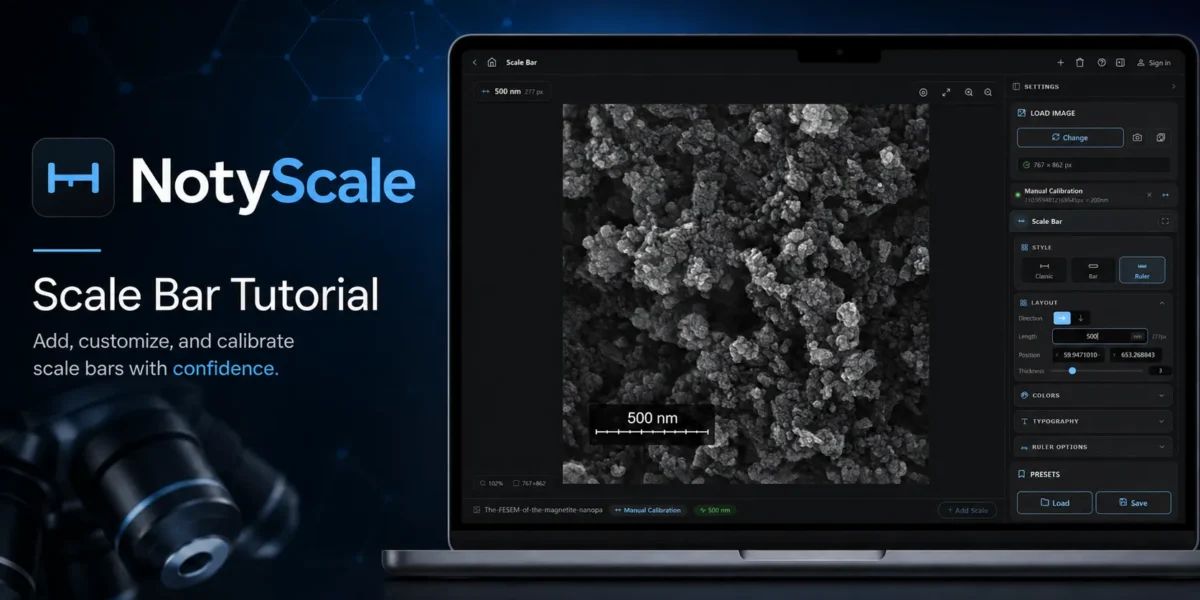
Adding an accurate scale bar to SEM images is essential for scientific publications, reports, and image analysis. A wrong scale bar can make measurements unreliable and may even cause journal rejection.
Step 1 — Import the SEM Image
Log in to NotyLab, then open NotyScale from the link below:
Import your SEM image.
Before calibration and adding a scale bar, keep this in mind:
- If the scale reference is separate from the image: Do not resize the image before calibration. Resizing changes the pixel-to-length relationship.
- If the original scale bar is already visible on the image: Resizing is fine, as long as the image and scale bar are resized together without changing the aspect ratio.
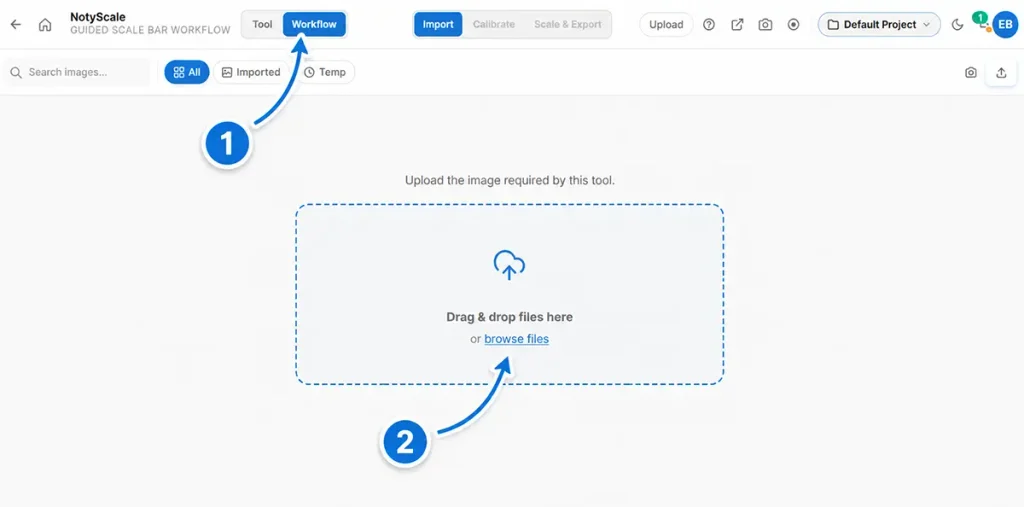
If your image has not been calibrated in NotyLab before, switch to Workflow at the top.
Workflow guides you through calibration and scale bar creation step by step, without switching between different tools.
Click Browse files and select your SEM image.
Step 2 — Calibrate the Image
Calibration defines the relationship between pixels and real-world distance.
Usually this comes from:
- microscope metadata
- scale information
- calibration references
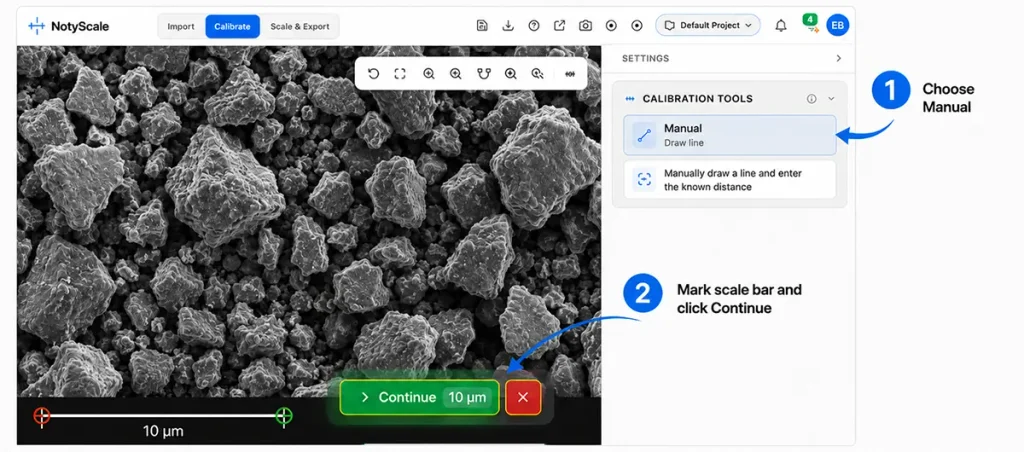
If the scale bar is already visible on the image, choose Manual, mark the two ends of the scale bar, click Continue, and check the calibration details before saving.
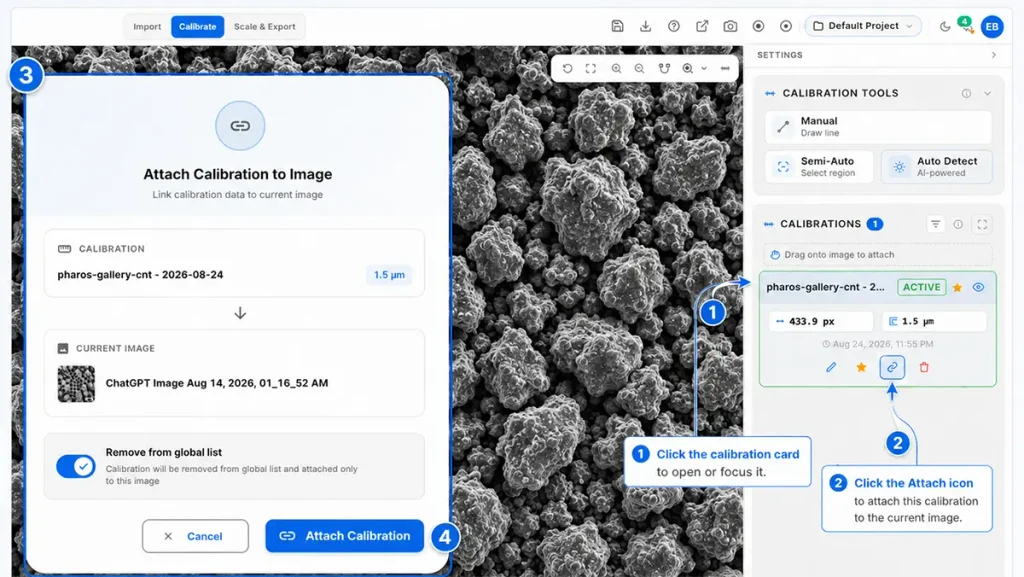
If the reference scale is in a separate image, first create the calibration from that reference image. Then open the calibration card, click Attach, and confirm by clicking Attach Calibration.
Once calibration is set correctly, the software can generate accurate scale bars automatically.
Step 3 — Crop the Image Carefully
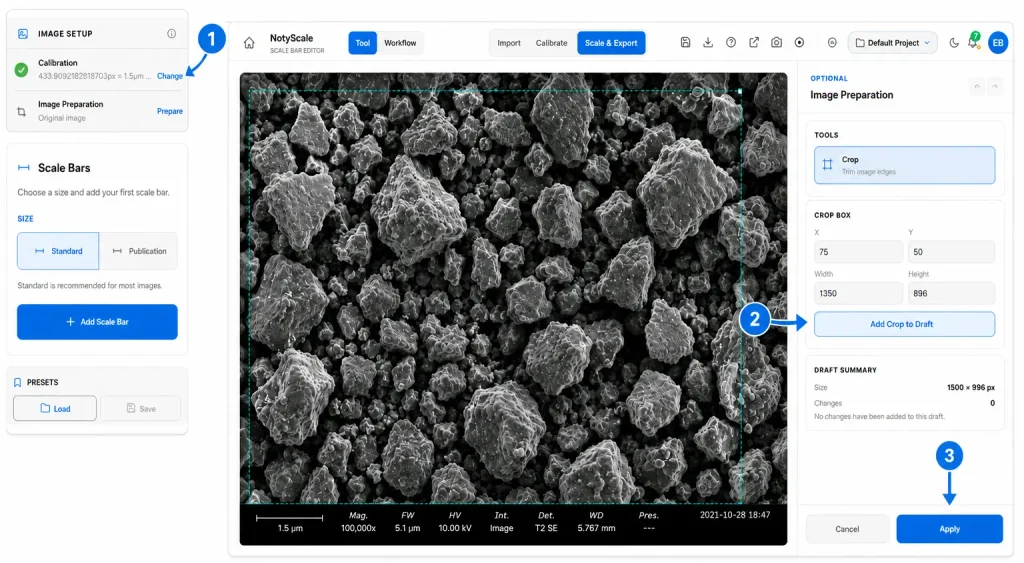
CIf the old scale bar is still visible on the image, use Image Preparation to crop it out before adding the new scale bar.
Click Prepare, adjust the crop area, select Add Crop to Draft, then click Apply.
If there is no old scale bar on the image, you can skip this step.
Step 4 — Add the Scale Bar
Click Add Scale Bar.
Then choose the scale bar style and adjust its layout, label, and color if needed. You can also move the scale bar to a suitable position on the image.
When the scale bar looks correct, click Export Image.
Your image is now ready to use in a publication, report, or presentation.
Common SEM Scale Bar Mistakes
- Adding scale bar before resizing
- Using incorrect calibration
- Exporting low-resolution figures
- Using unreadable labels
- Stretching the image
Final Thoughts
An accurate SEM scale bar is critical for scientific integrity and reproducibility.
Using a structured workflow helps avoid calibration mistakes and creates publication-ready microscopy figures much faster.